Showing posts with label Dessert. Show all posts

EASY WATERMELON SMOOTHIE RECIPE

by
Easy Watermelon Smoothie Recipe – simple, light, sweet and refreshing drink, made in two minutes with just five simple ingredients. Perfect for summer! 


cookinglsl.com


It is watermelon season and by far my favorite time of the year! The weather is hot and humid around here, but knowing that this is not gonna last forever, I love it! That’s why I like to make hydrating drinks like this Easy Watermelon Smoothie Recipe.


But honestly, to me – watermelon is a great fruit to enjoy year round, if you can find it at the supermarket.

WHY MAKE A WATERMELON SMOOTHIE?
Watermelon it the perfect fruit for summer. Juicy and refreshing, perfect for on the go snack. We go to picnics with my son all the time and I always pack a container with sliced watermelon. It helps us beat the heat.

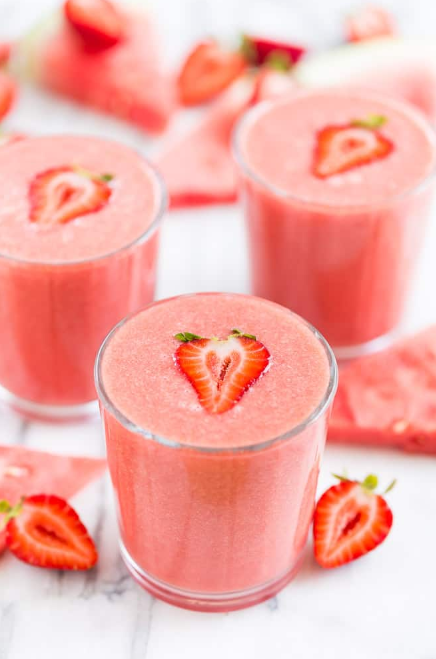
I also been making myself a watermelon smoothie to pour into my favorite on the go cup and take in the car. This is why today I’m sharing this Easy Watermelon Smoothie Recipe with you.


cookinglsl.com


Watermelon is also perfect for drinks, salads and smoothies. You may be asking yourself, can watermelon be used in a smoothie? Absolutely! It is perfect for summer smoothies. You may use it fresh or frozen.

It is great for salads and appetizers, too!

Watermelon is a perfect ingredient for on-the-go meals and snacks!


INGREDIENTS NEEDED TO MAKE STRAWBERRY WATERMELON SMOOTHIE:

  • fresh watermelon slices
  • frozen strawberries
  • hemp seeds  (or chia seeds), they add thickness and protein
  • Almond milk – it adds some thickness as well. This is a watermelon smoothie with milk.
  • lime juice – adds a little zing
  • sweetener – I never use a sweetener, but I understand that some people would like their smoothies more sweet. Use a sweetener of your choice.

cookinglsl.com


WHAT SWEETENER TO USE IN A SMOOTHIE?
Anything from dates, regular sugar, maple syrup, agave nectar, liquid Stevia or erythritol could be used to sweeten this smoothie.

INGREDIENTS

  •  5 cups fresh watermelon
  •  1 lime
  •  1 cup frozen strawberries
  •  2 tbsp hemp seeds — chia seeds could be used
  •  1/2 cup almond milk
  •  sweetener of your choice


INSTRUCTIONS

  1. Place all ingredient in a blender and blend until smooth. Serve immediately.


If you want an even more detailed breakdown of how to do a detox, check out the 21 Day Smoothie Diet Plan which includes a 3 day detox plan complete with shopping lists, recipes and more. Watch the short video below for more info.


Strawberry Watermelon Smoothie

by
This Strawberry Watermelon Smoothie is my favorite summertime refresher!


getinspiredeveryday.com


Tips for how to make this Strawberry Watermelon Smoothie:
You can make as much smoothie as your blender can hold, or you can par back a little for a single serving. First, split your watermelon open, and scoop out enough to fill a Vita-Mix blender, or other high speed blender. 
You will have about 9 cups of watermelon pieces, and 6 cups of watermelon purée after blending. Nine cups of watermelon is about 3 pounds. The watermelon that I bought weighed 18 pounds, so I’ll be making this everyday this week!


getinspiredeveryday.com


After blending the watermelon, add the lemon juice and frozen strawberries to the blender. Blend until smooth, and drink with great enthusiasm right away!

Here’s to the long, hot days of summer – I’m going to enjoy every minute while it lasts!

INGREDIENTS

  • 9 cups watermelon pieces, seedless
  • 12 ounces of frozen strawberries
  • 1/4 cup freshly squeezed lemon juice
  • optional sweetener if your fruit isn’t perfectly ripe
INSTRUCTIONS
  1. Place the watermelon pieces into a blender and blend until smooth.
  2. Add the strawberries and lemon juice and blend again until smooth.
  3. Serve right away or refrigerate for up to 1 day.


NOTES

This smoothie tastes best right away, but it will be almost as good refrigerated for up to one day.


If you want an even more detailed breakdown of how to do a detox, check out the 21 Day Smoothie Diet Plan which includes a 3 day detox plan complete with shopping lists, recipes and more. Watch the short video below for more info.


Strawberry Watermelon Smoothie

by
Here’s a refreshing watermelon smoothie recipe with strawberry and lime that’s perfect for summertime. Just four simple ingredients to blend and sip to energize your day!

Are you looking for a refreshing summer beverage? Then I got what you need! I made a strawberry watermelon smoothie that will cool you down in an instant. Have you noticed strawberries in season at the market yet?


jessicagavin.com


There is a fabulous local grocery store walking distance from our home, and they have dozens of flats just showcased out front. They were calling my name, plus the price was good. I also couldn’t resist grabbing a seedless watermelon to cut up and make the smoothie even more delicious.

Eating a juicy watermelon means it’s officially summertime, so let’s not wait a second longer. This mixture has just four ingredients to smoothie bliss, and it’s ready in under 5 minutes. Just grab a straw and sip away, sunshine and sea breezes here we come!


jessicagavin.com


If you don’t have access to ripe berries right now, frozen strawberries will work. The fresh lime and mint opens up your senses and immediately invigorates you. I grabbed a seedless watermelon and chopped it into cubes, tossing any leftovers in the freezer for my next smoothie fix.

Since all of the berries and melons are at the beginning of their season and pretty ripe, it added just the right amount of sweetness to this cold drink. You can use a natural sweetener like agave nectar, honey or maple syrup if you want to please your sweet tooth and balance some of the tartness from the lime juice.


jessicagavin.com


Ingredients


  • 4 cups watermelon, diced, seedless
  • 4 cups strawberries, frozen
  • 2 tablespoons lime juice
  • 6 large mint leaves, fresh
  • 2 teaspoons agave nectar, honey or maple syrup (optional)

Instructions

  1. Add all ingredients into a blender.
  2. Blend until smooth, about 30 seconds to 1 minute.

Notes

  • If you only have fresh strawberries, add 3-4 cups of ice and blend until thickened.
  • Use coconut water to thin out the smoothie if needed.
  • Depending on the ripeness of the fruit option to add a natural sweetener if the smoothie is not as sweet as you would like.


If you want an even more detailed breakdown of how to do a detox, check out the 21 Day Smoothie Diet Plan which includes a 3 day detox plan complete with shopping lists, recipes and more. Watch the short video below for more info.


BLUEBERRY LEMON LAYER CAKE

by
theviewfromgreatisland.com


Blueberry Lemon Layer Cake ~ a vibrant layer cake recipe bursting with juicy berries and fresh lemon.  It makes a wonderfully unique birthday cake, and I’ve yet to meet a soul who can resist this fabulous dessert.


theviewfromgreatisland.com


Ingredients


  • 3 cups or 409 grams, cake flour (you can use regular flour)
  • 1 Tbsp baking powder
  • 1/2 tsp salt
  • 1 and 3/4 cup or 368 grams, granulated sugar
  • zest of 1 lemon peeled with a vegetable peeler (no white pith)
  • 1 cup or 226 grams, unsalted butter, at room temperature
  • 3 jumbo or 4 large eggs at room temperature
  • 2 tsp lemon paste optional!
  • 1 cup or 240 grams buttermilk
  • 1/3 cup or 81 grams fresh lemon juice
  • 1 pint blueberries plus extra for decorating the cake

lemon buttercream

  • 1 cup or 226 grams unsalted butter, at room temperature
  • 6 cups or 600 grams, confectioner's sugar
  • 6-8 Tbsp or 90-120 grams fresh lemon juice plus more if needed

garnish

  • blueberries
  • thyme sprigs
  • powdered sugar

Instructions

  1. Preheat oven to 350F Grease and flour two 9-inch round cake pans, putting a round of parchment paper at the bottom of each one.
  2. Whisk together the flour, baking powder and salt and set aside.
  3. Put the sugar and lemon zest into a food processor and process until moist, pale yellow, and no large pieces of zest remain. This will take under a minute.
  4. Cream the butter and sugar together in a stand mixer for 3 minutes, scraping down the sides of the machine as necessary.
  5. Beat in the eggs, one at a time, scraping down the sides of the bowl in between each addition. Beat in the lemon paste, if you're using it.
  6. Turn the mixer to low and add the flour mixture, and just before it's completely mixed in, add the buttermilk and lemon juice. Blend until combined, but don't over-mix. I like to finish by hand to get everything incorporated.
  7. Gently fold in the blueberries. Note: I didn't use quite the whole pint. Then divide the batter equally between the two prepared pans. Spread out to an even layer.
  8. Bake the cakes in the center of the oven for about 35 minutes, or until just beginning to pull away from the sides of the pan, the top springs back when touched, and a toothpick comes out without any wet batter on it (moist crumbs are fine.)
  9. Let the cakes cool on a rack for 10 minutes, then remove them from the pans and continue to cool completely before frosting.
  10. To make the frosting, beat the soft butter and sugar together, gradually adding enough lemon juice to create a creamy spreadable frosting. If it is too thick, add more lemon juice, and if it is too thin, add a little more sifted sugar.
  11. Frost the cake and then decorate as you like.

STRAWBERRY ICEBOX CAKE

by
eatingonadime.com

You will not believe how simple and delicious this Strawberry icebox cake is! With only 3 ingredients, this dessert can be made in a flash! It’s the perfect  summer dessert or anytime of the year!


eatingonadime.com


Strawberry Icebox Cake

  • This dessert looks amazing and tastes just as good! It’s my go to dessert when I need something fast. It’s simple and easy with only 3 ingredients!
  • It does not get any simpler than this! You are going to love how amazing it tastes. Despite how easy it is, it tastes like you spent a ton of time on this creamy dessert.
  • The strawberries and whipped topping blend to make decadent layers between the graham crackers. This easy dessert reminds me of strawberry shortcake.
  • Strawberry icebox cake with cool whip is just that easy! 
  • I told you it was so simple and this dessert does not disappoint. It’s always a hit with everyone.
  • You could also try making this dessert with blueberries! Or try blueberries and strawberries. That would be really pretty for a patriotic dessert for the 4th of July.
  • It’s so simple and just requires spreading a few ingredients. No need for a stand mixer or anything fancy.


Ingredients

  • (2) 8 oz containers Cool Whip thawed
  • 1 1/2 lbs Strawberries hulled and sliced
  • 1 1/2 packs Graham Crackers

Instructions

  1. Spread a 1/2 container of whipped topping in a layer on the bottom of an 8x8" pan.
  2. Add a layer of graham crackers, breaking as necessary to cover whipped topping.
  3. Top with another 1/2 container of whipped topping and smooth with a spatula.
  4. Add 1/3 of the strawberries in an even layer.
  5. Then graham crackers, whipped topping, strawberries,graham crackers, whipped topping and strawberries.
  6. Cover and refrigerate at least 4 hours before serving.

Recipe Notes
This recipe would be delicious made with any fruit. Try making it with your favorite, or even combining a few of your favorites together.


Watermelon Smoothie Recipe

by
It’s summertime and you are still finding a way to beat the heat? Today’s watermelon smoothie recipe is just the thing that will get you through this season feeling joyful and refreshed.

MINT BROWNIES

by


Easy-to-make mint brownies with a thick layer of mint frosting and a soft chocolate ganache topping.

Mint brownies

  • When I was in my junior year of college at BYU, I worked for a bit at one of the Creamery’s in Provo. I’d work early in the morning, go to classes and do homework, and then wait tables at night. If you are from Utah and live near the Provo area you likely know about the BYU Creameries. They are pretty “famous” in and near Provo for their ice cream (Their Graham canyon ice cream contains all good things in life). They’re also known for their donuts and mint brownies.
  • If you happened to be the first person at work when the orders came in, you got the oh-so-coveted responsibility of cutting up the mint brownies. This was the best responsibility because the small little corners or edge pieces that weren’t so pretty? They were fair game. Meaning, we were allowed to eat all ugly pieces. Naturally, I was always early to work. And I cut up and subsequently ate those edge pieces far, far too often! 
  • So, I feel that this experience has definitely made me an expert with all things mint brownies. And by expert, I mean, I don’t settle for second rate mint brownies. This recipe has been several months in the making. I’ve tried lots of different ingredients/quantities/methods and am so excited to finally share with you my very favorite mint brownies. 


Mint brownie tips

  • For easier bar removal, line the pan with parchment paper.
  • Make sure the cream cheese and butter are softened to room temperature before beating; otherwise the frosting can get a bit lumpy and not mix smoothly.
  • If your brownie mix comes with a fudge layer: leave it out of the mix and spread it onto the brownies straight from the oven instead; this gives you another delicious layer!
  • Chop Oreos finely: we don’t want chunks of Oreos in the brownies, but rather for the small pieces to melt and further intensify the chocolate flavors in the brownies.
  • Be patient in layering: the brownies need to be completely cooled and firm before adding the frosting and the frosting needs to be chilled before adding the chocolate ganache. Take your time layering this dessert for best results. I usually make the brownie base the night before!
  • For easier slici


Ingredients

  • 1 package (17.8 ounces) brownie mix AND ingredients called for on the back (I recommend Betty Crocker's Supreme Triple Chunk)
  • 6 regular Oreos, finely chopped (leave the creme filling inside)

Frosting

  • 3 ounces (88g) full-fat cream cheese
  • 4 tablespoons (56g) unsalted butter
  • 1 teaspoon peppermint (not mint) extract
  • 1/16 teaspoon fine sea salt
  • 2 cups (225g) powdered sugar
  • Optional: green food coloring

Ganache

  • 1 cup + 2 tablespoons (200g) milk chocolate chips (or semi-sweet chocolate chips if desired)
  • 2/3 cup (160g) full fat heavy cream
  • 1 tablespoon (14.2g) unsalted butter


Instructions

  1. BROWNIES: Preheat the oven to 350 degrees F. Line a 9x9 inch (8x8 inch works, but we prefer 9x9) baking pan with parchment paper leaving an overhang. Follow package directions to prepare the brownies -- do NOT add a fudge packet if it came with your brownies (reserve the packet for later). Very finely chop up 6 Oreos and add to the brownie ingredients. Stir everything together to get a thick brownie batter. Transfer to the prepared pan and bake according to package instructions. Don't over-bake. As soon as brownies are baked, remove from the oven and allow to cool for 3-4 minutes. Now IF you had a fudge packet, spread it over the brownies here. Cover the brownies tightly and place in the fridge (or freezer) while preparing the frosting layer.
  2. FROSTING: In a large bowl, beat together the (softened to room temperature; not melted) cream cheese and butter until smooth and creamy. Add in the peppermint extract (to preference; we use 1 teaspoon (See Note 1). Add in the salt, food coloring if using, and powdered sugar. Beat until smooth and creamy. Resist the urge to add milk or cream, it will seem like it’s not coming together at first but just keep beating until it does. Scrape down the sides as needed with a spatula. Spread frosting evenly over completely cooled brownies. Return the brownies to the fridge while preparing the ganache.
  3. GANACHE: measure chocolate chips out in a heatproof bowl. Add heavy cream and butter to a glass measuring cup and microwave until steaming hot (but not boiling), about 1 to 1 and 1/2 minutes. Pour the hot cream mixture over the chocolate chips. Do not stir. Cover the bowl with the chocolate chips with a pot lid or whatever you have to keep in the heat. Let stand for 5 minutes. Then stir until chocolate is fully melted and smooth. If needed, microwave the mixture for 15 seconds to further melt. Let ganache stand for 10-15 minutes to thicken. Whisk again and then pour and smooth over the frosting layer. Let brownies stand at room temperature for 30 minutes (to keep the top glossy, don't immediately refrigerate) and then refrigerate for 2-3 hours or until chocolate topping is firm. 
  4. SERVE: using the overhang of parchment, remove brownies from the pan and cut with a very sharp knife. To get clean cuts, run your knife under very hot water, dry, and then slice in quick fast cuts.


Recipe Notes

  • Note 1: the strength of the extract varies from brand to brand; I use McCormick peppermint extract and 1 teaspoon is perfect for us. Taste the frosting and decide if you'd like more extract up to 1 and 1/2 teaspoons.

Funfetti Bars

by


Gooey, sweet, and loaded funfetti bars. A chocolate chip cookie base with a delicious candy packed top — marshmallows, chocolate-covered pretzels, miniature M&Ms, and sprinkles!


How to make Funfetti Bars
  • The photo collage above and below this text show the general process of making these funfetti bars.
  • Make the cookie base: take your time to really cream the butter and sugars — this will create a great foundation for the cookie bars.
  • Top baked bars with marshmallows and bake again.
  • Meanwhile, chop up chocolate covered pretzels (Flipz).
  • Add chocolate covered pretzels, miniature M&Ms, and sprinkles (I totally left these out in pictures, but we always have them on the bars!) to the bars.
  • Let cool and then cut into bars.
  • Variation ideas
  • Pretty much any chocolate candy works on top of these funfetti bars! If you have some leftover candy, chop it into small pieces and add it on top.
  • The chocolate covered pretzels and miniature M&Ms can be substituted with equal amounts of any other chopped candy. Some ideas: chocolate covered almonds, chopped up candy bar (Snickers, Hershey’s bar, etc), white chocolate covered pretzels, peanut butter M&Ms etc.
  • Make these bars festive by using holiday (or event) colored M&Ms and sprinkles. I shared these Spring Confetti Bars a few years ago and they’ve been a huge hit on this site!

Ingredients
Cookie Bars
  • 6 tablespoons (85g) unsalted butter room temperature
  • 1/2 cup (110g) brown sugar, lightly packed
  • 1/4 cup (55g) white sugar
  • 1 large egg
  • 1 teaspoon pure vanilla extract
  • 1/4 teaspoon baking soda
  • 1/4 teaspoon fine sea salt
  • 1 cup + 2 tablespoons (142g) white flour
  • 1 cup (165g) milk chocolate chips (can also use semi-sweet chocolate chips)
Toppings
  • 1 and 1/2 cups (60g) white miniature marshmallows
  • 1/4 cup (50g) miniature M&Ms Note 1
  • 3/4 cup (66g) chocolate-covered pretzels, coarsely chopped
  • 2 tablespoons sprinkles

Instructions
  1. PREP: Preheat the oven to 325 degrees F. Line an 8 x 8 pan with parchment paper (do not skip, these bars are sticky!) and set aside.
  2. COOKIE BASE: In a large bowl, using hand mixers, cream the room temperature butter (do not melt at all) with the brown sugar and white sugar. Beat in the egg and vanilla extract. Then add the baking soda, salt, flour, and chocolate chips. Beat until the dough is combined and smooth. It is a bit wet.
  3. BAKE: Press the dough evenly into the bottom of the prepared pan and bake for 19-23 minutes or until lightly golden brown at the edges and firm in the center (shouldn't be glossy)
  4. MARSHMALLOWS: Remove from the oven and top with the marshmallows. Bake for 1 and 1/2 more minutes and remove.
  5. CANDY: Top with the miniature M&M's, coarsely chopped chocolate pretzels, and sprinkles.
  6. COOL: Let funfetti bars cool at room temperature for at least an hour, then cut into bars (with a hot sharp knife -- run under hot water, dry, cut, repeat), and enjoy! Best enjoyed within the same day these are made because of the marshmallows on top.
  7. STORAGE: If you have some leftover, you can keep these bars, tightly covered, at room temperature for up to 3 days. They can also be stored in an airtight container in the fridge for up to a week, but the marshmallow does lose flavor and texture.

Recipe Notes
  • Note 1: Miniature M&Ms can be found on the baking aisle of most grocery stores; they're labeled as M&M milk chocolate baking bits.

PUMPKIN CHOCOLATE CHIP COOKIES

by
The best ever pumpkin chocolate chip cookies! These cookies are soft and chewy with crisp edges instead of typical cake-like pumpkin cookies.


How to make pumpkin chocolate chip cookies

  • Melt the butter: melting the butter is going to give these cookies that soft & chewy texture
  • Add sugars to the cooled butter: once the butter is melted, it needs to cool back down to room temperature otherwise the butter will melt the sugars and make these cookies greasy and flat
  • Stir the sugars into the butter until smooth
  • Add the pumpkin, vanilla extract, and the egg yolk of an egg. Save the whites for a different recipe like this egg wrap
  • Mix until smooth
  • Add in all the spices, salt, and baking soda: spices can be added to preference, how the recipe is written is exactly how we like these cookies. You could also replace all the spices (except the cinnamon) with 1 to 1 and 1/2 teaspoons of pumpkin pie spice
  • Stir until everything is well incorporated: we don’t want a pocket of spice ending up in one cookie!
  • Add in flour and chocolate chips: we love milk chocolate chips in this recipe, but semi-sweet or dark chocolate would also be delicious — use whatever is your favorite
  • Mix until you’ve got a thick (sticky) cohesive dough. Cover tightly and chill the dough for one hour.
  • Roll cookie dough balls that are taller rather than wider. Cookie dough balls should be 1 and 1/2 tablespoons of dough or about 30 grams if you’ve got a food scale handy.


Pumpkin chocolate chip cookies troubleshooting

  • Why are my pumpkin chocolate chip cookies hard?
  • Most likely because the cookies were baked too long or at too high a temperature. Make sure your oven is correctly calibrated and watch the cookies closely near the end of bake time.
  • You cookies could also be hard if you over-measured the flour or if other ingredients weren’t fresh. Ensure your baking soda is fresh and your brown sugar isn’t too hard.
  • Why are my pumpkin chocolate chip cookies flat?
  • Most likely because the cookies did not chill long enough. Since there is melted butter in the batter, it needs a chance to firm up again. Also, if the butter was too hot when you added in other ingredients, they’ll likely end up a bit flat and greasy.
  • These pumpkin chocolate chip cookies will also be flat if the flour was under-measured. One other factor that comes into play is if you live in a high altitude area. 


How do you keep cookies soft after baking?

  • After baking the cookies, let them cool completely on a wire rack (this will keep the bottoms from getting soggy from the steam). Once cooled, place cookies in an airtight container and store at room temperature. For tips on how to “revive” cookies, check out these tips from Cooks Illustrated. Note that these cookies are best eaten within 3 days; after that they begin to lose texture and flavor.


Ingredients

  • 1/2 cup (111g) unsalted butter
  • 1/4 cup (53g) white sugar
  • 3/4 cup light brown sugar, lightly packed
  • 1 large egg yolk (discard whites or save for another recipe)
  • 1 teaspoon vanilla
  • 1/3 cup (72g) canned pumpkin (NOT pumpkin pie filling; not an entire can)
  • 1/4 teaspoon fine sea salt
  • 1 teaspoon ground cinnamon
  • 1/4 teaspoon ground ginger
  • 1/8 teaspoon EACH: ground cloves and nutmeg
  • 1/4 teaspoon ground allspice
  • 3/4 teaspoon baking soda
  • 1 and 1/2 cups (190g) white all-purpose flour
  • 2/3 cup (110g) chocolate chips (we like milk chocolate best!)

Instructions

  1. MELT BUTTER: In a large, microwave safe bowl, melt the 1/2 cup butter. Let the butter stand at room temperature until cooled to room temperature. It is very important the butter isn't hot or it will melt the sugars and cause greasy cookies.
  2. ADD SUGARS: Add in 1/4 cup white sugar and 3/4 cup lightly packed light brown sugar to the room temperature melted butter. Stir with a wooden spoon until smooth.
  3. REMAINING WET: Add in the large egg YOLK (discard or save the whites for a different recipe), 1 teaspoon vanilla extract, and 1/3 cup canned pumpkin. Make sure the pumpkin isn't watery; dab off excess moisture IF it is watery. Stir until ingredients are combined.
  4. SPICES: Add 1/4 teaspoon fine sea salt, 1 teaspoon ground cinnamon, 1/4 teaspoon ground ginger, 1/8 teaspoon ground cloves, 1/8 teaspoon ground nutmeg, 1/4 teaspoon ground allspice, and 3/4 teaspoon baking soda. Stir until spices are well incorporated.
  5. FLOUR AND CHOCOLATE: spoon and level (See Note 1) to measure 1 and 1/2 cups flour and add add that to the bowl. Add the 2/3 cup chocolate chips right on top. Gently stir to form a dough. It will seem dry at first, continue to stir until you have a thick and sticky dough. Cover the bowl tightly and refrigerate for one hour.
  6. BAKE: preheat the oven to 350 degrees F. Line a sheet pan with parchment paper or a silpat liner. Measure cookie dough balls that are 1 and 1/2 tablespoons big (or 30 grams). Roll the balls so they are taller rather than wider (see photo in post). Place 6 cookie dough balls on the sheet pan and then place in the freezer for 8 minutes. Remove and bake for 8-11 minutes (we like them best at 9 minutes! Slightly under-baked will yield super soft and chewy cookies) or until no longer glossy on top. Remove from the oven and let cookies stand on sheet pan for 5 minutes. IF desired, press a few more chocolate chips into the tops of the cookies.
  7. STORAGE: using a metal spatula, transfer cookies to a cooling rack and allow the cookies to finish cooling. They firm up more as they cool. Store in an airtight container at room temperature for up to 3 days.


Recipe Notes

  • Note 1: if you press a measuring cup into a bag of flour you will pack way too much flour in; use a spoon to scoop it into a measuring cup and then level the top with the back of a butter knife. If your pumpkin chocolate chip cookies turn out cake-y, there was likely too much flour added. Best case: use a food scale! We want 190 grams of flour.

CHOCOLATE MIRACLE WHIP CAKE

by


Chocolate Miracle Whip Cake - a classic dessert that has been in the family for years! No eggs or oil in the cake batter! SO easy to make - sugar, water, Miracle Whip, vanilla, flour, baking soda, and cocoa powder. Top the cake with a quick homemade cream cheese frosting made with cream cheese, cocoa powder, butter, powdered sugar, heavy cream, and vanilla. This cake is to-die-for delicious! Great for parties, potlucks, and the holidays!


INGREDIENTS:
Cake
  • 1 cup sugar
  • 1 cup Miracle Whip
  • 1 cup water
  • 1 tsp vanilla
  • 2 cups flour
  • 2 tsp baking soda
  • 1/4 cup cocoa powder
Chocolate Cream Cheese Frosting
  • 4-oz cream cheese, softened 
  • 1/4 cup butter, softened 
  • 1 tsp vanilla extract 
  • 1 (16-oz.) package powdered sugar 
  • 1/4 cup unsweetened cocoa 
  • 3 Tbsp heavy cream
INSTRUCTIONS:
  1. Preheat oven to 350ºF. Grease and flour a 9x13-inch cake pan.
  2. Whisk together sugar, Miracle Whip, water, and vanilla. Add flour, baking soda, and cocoa powder.
  3. Pour batter into the prepared cake pan. 
  4. Bake at 350° for 30 to 35 minutes or until a wooden pick inserted in center comes out clean. Cool completely on a wire rack (about 1 hour).
  5. Spread with frosting.
Chocolate Cream Cheese Frosting
  1. Beat together cream cheese, butter, and vanilla at medium speed with an electric mixer until creamy. 
  2. Gradually add powdered sugar and cocoa powder to butter mixture, alternately with heavy cream. 
  3. Beat at low speed until blended. Increase mixer speed to medium, and beat 1 to 2 minutes or until light and fluffy.
  4. Spread frosting on cooled cake.
NOTES:
  • May substitute mayonnaise for Miracle Whip, if desired.
  • May add 1/2 tsp of cinnamon to cake batter, if desired.

PUMPKIN PECAN PIE

by


Pumpkin Pecan Pie - two favorites in one pie! Pumpkin pie on the bottom and pecan pie on top. SO good! Pie crust, pumpkin, eggs, sugar, pumpkin pie spice, corn syrup, butter, vanilla, and chopped pecans. You can make the pie a day or two in advance. Top the pie with whipped cream or vanilla ice cream. A must for your holiday table! #dessert #pie #thanksgiving #pumpkin #pecan #christmas


INGREDIENTS:

  • 1 (9-inch) frozen deep-dish pie shell
  • 1 cup 100% pure pumpkin
  • 1/3 cup granulated sugar
  • 1 large egg
  • 1 tsp pumpkin pie spice
  • 2/3 cup light corn syrup
  • 1/2 cup granulated sugar
  • 2 large eggs
  • 3 Tbsp butter, melted
  • 1/2 teaspoon vanilla extract
  • 1-1/3 cup chopped pecans

INSTRUCTIONS:

  1. Preheat oven to 350° F.
  2. For Pumpkin Layer: Combine pumpkin, sugar, egg and pumpkin pie spice in medium bowl; stir well. Spread over bottom of pie shell.
  3. For Pecan Layer: Combine corn syrup, sugar, eggs, butter, and vanilla extract in a medium bowl; stir in nuts. Spoon over pumpkin layer.
  4. Bake for 50 to 55 minutes or until knife inserted in center comes out clean. Cool completely on wire rack.

NOTES:

  • Make sure to use 100% pure pumpkin and not pumpkin pie filling.
  • Can make pie a day or two in advance.

CHOCOLATE CHIP BUNDT CAKE RECIPE

by
This Chocolate Chip Bundt Cake is seriously the BEST. Homemade buttermilk pound cake loaded with pecans and chocolate chips. Top the cake with some vanilla ice cream and caramel sauce and prepare to be wowed! Pecans, sugar, brown sugar, butter, vanilla, eggs, flour, baking soda, salt, buttermilk, and chocolate chips. Can make in advance and refrigerate or freeze for a sweet treat later! #cake #dessert #poundcake #chocolatechips #bundtcake


INGREDIENTS:

  • 2/3 cup chopped pecans
  • 1/4 cup butter, softened
  • 2 Tbsp sugar
  • 1 cup butter, softened
  • 1 cup firmly packed brown sugar
  • 1/2 cup sugar
  • 1 Tbsp vanilla extract
  • 4 eggs
  • 2-3/4 cups all-purpose flour
  • 1 tsp baking soda
  • 1tsp salt
  • 1 cup buttermilk
  • 1 (12-oz) package semi-sweet mini chocolate chips

INSTRUCTIONS:

  1. Preheat oven to 350ºF. Spray a 12-cup bundt pan with baking spray.
  2. Combine pecans, 1/4 cup butter, and 2 Tbsp sugar. Sprinkle in the bottom of the bundt pan.
  3. In the bowl of an electric stand mixer, beat together 1 cup butter, brown sugar, sugar, and vanilla at medium speed for 3 to 5 minutes, until light and fluffy. Add eggs, one at a time, beating just until blended.
  4. Combine flour, baking soda, and salt. Add flour mixture alternately with buttermilk, beginning and ending with flour mixture. Beat at low speed just until blended after each addition, stopping to scrape bowl as needed.
  5. Stir in chocolate chips and spoon batter into prepared pan.
  6. Bake for 50-55 minutes, or until a long wooden pick inserted in center comes out clean. Cool in pan on a wire rack for 10 minutes. Remove cake from pan to wire rack and cool completely.